Showing posts with label Crafts. Show all posts

8.21.2011

Crayon Wreath


Yes - this is yet another Pinterest inspired creation.  I saw these and just loved them.  What better time of the year to use crayons than Back to School.  I got packs of 24 for 40 cents each and it only took 2 1/2 boxes.

You need:
A wooden 12 in floral/craft ring (I got mine at Michaels for $1.99)
3 24 packs of crayons
Hot glue gun
Hot glue
Ribbon
Embellishments if wanted
Paint if wanted

Start by painting the wooden craft ring.  I used spray paint in red.  After putting the crayons on you can barely see the ring, so it is not totally needed.

Start to hot glue the crayons on.  It is very important that you let the crayons touch on their bottoms but spread apart on the top.  It is the only way that they will make a circle.  I did one crayon at a time and alternated the colors.

Once the crayons are on, place the ribbon where you would like it and tie a bow.  If you are adding an embellishment, just hot glue it on.  I got the wooden apple and little bus at Michaels also.  It was less than a dollar for both.
Taft helped open the crayons and pick the colors.  He also picked the yellow ribbon.  I asked him if he wanted to take it to his teacher tomorrow, but he said he wants to keep it at home.

8.06.2011

Ribbon~Button Bookmarks


These are SO simple and easy!  Cute bookmarks for all those kids going back to school soon.
What you need:
Scissors
Ribbon (grosgrain works best)
Buttons
Thread or embroidery floss
Lighter or  a fray away product (I prefer the lighter since it it faster)

 Take you ribbon and measure it into 18 inch pieces.  If it wrinkled, like mine always is, you can give it a quick trip under the iron.
To keep the ends from fraying with use, you can use Fray Away, or a lighter.  I use the lighter since it is faster.  Just make sure that the ribbon you are using is not flammable.
Start with one end of the ribbon and fold it over, about one inch. (Photo 1)  Place your button where you like and sew it on. 


(Photo 2) You can use regular thread or embroidery floss.  The embroidery floss comes in great colors and holds well.
And the next thing you know, you have bookmarks!  Be sure to look for a few special buttons.  They cost a little more but them make with most adorable bookmarks.  Remember~Children use things they help pick out themselves and take part in making.

7.12.2011

Christmas Card Challenge @ Operation Write Home

This week's card challenge at Stamps and Stars was to make a Christmas themed card and I am linking up there.  I made these two.  Very simple but I love them. 

7.01.2011

Fall/Autumn Card Challenge @ Operation Write Home

I made these cards for Operation Write Home.  I am not a cardmaker at all, so these are very simple.  I do scrapbook so I am lucky to have A LOT of supplies on hand. 
This week's challenge is to make Fall/Autumn themed cards.  Here are three that I have made tonight.  I scanned them and the color is not great.  I need to find a better way to photo them.  ;0
I am linking up to their Stars & Stamps Blog


6.27.2011

All-American Eagle Shirt

I am a sucker for artwork made from kids hands and feet.  I just love it!  This shirt is made with both so I had to give it a try.  I have seen a few versions, but in the end we made up our own.

You Will Need:
A pre-washed shirt
Fabric paint (White, Brown, Black, and Yellow)
Cardboard, we used an old cereal box
Paint brush or sponge
Styrofoam plates
Wipes or wet paper towels

Start by placing cardboard in the shirt to protect the back from bleeding paint.  We cut a cereal box to fit the shirt. 
Add brown and white paint in a plate.  Sponge the brown paint onto your child's foot and white paint onto the toes.  Place the foot on the shirt with the toes toward the bottom.  This is the body and tail feathers of the eagle.
Next - paint the child's hand and fingers, leaving out the thumb and place on the shirt with the palms touching the "body".  The palm of the hand makes the wings and the fingers are feathers.
Then, have the child make a fist.  Paint the pinkie side of the fist with white paint and place on the shirt to form a neck and head. 

You then need to draw on a beak and add an eye.  All that is left is to let the shirt dry according to the directions on your paint.  Perfect for any Patriotic holiday!

6.25.2011

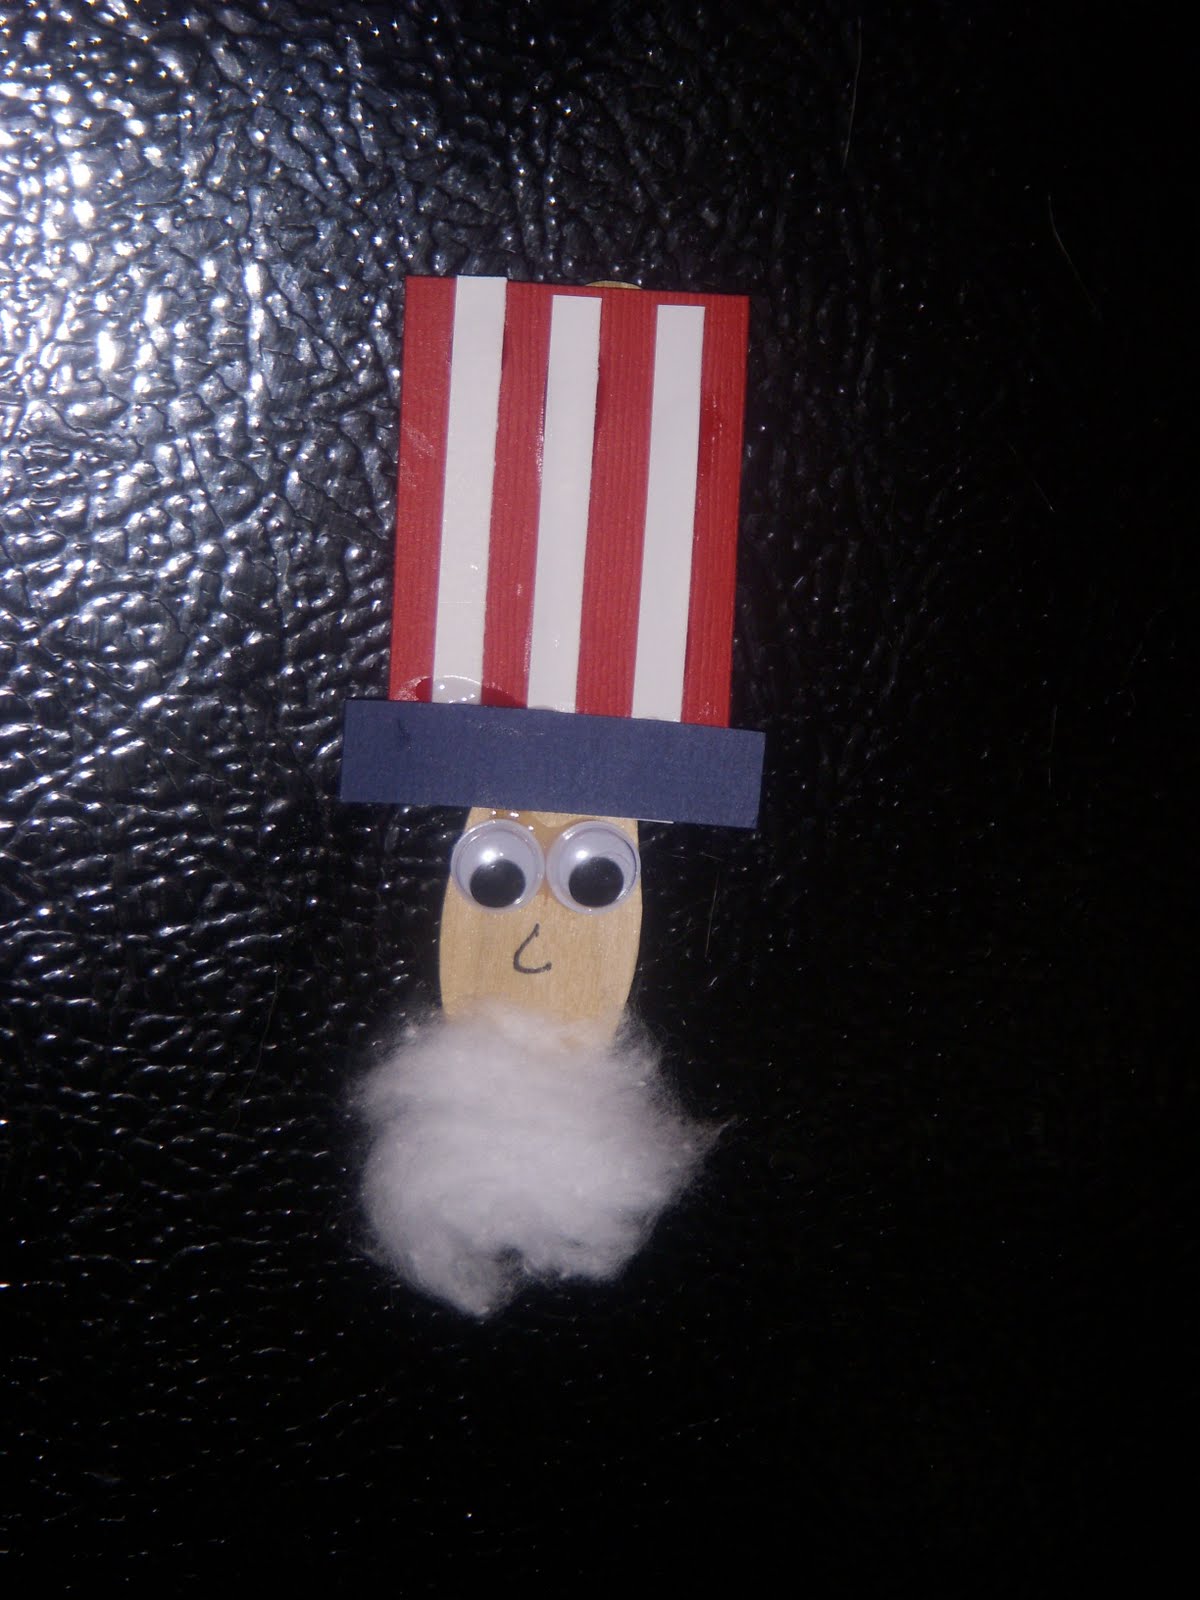
Uncle Sam Pin


For each Uncle Same pin you will need:
A craft spoon
Googly eyes
A cotton ball
A top hat - you can make it from red, white, and blue paper pieces OR cut out a hat from white paper and have the kids color their own
Glue
Scissors
Magnet or pin for attaching to clothing
Black pen


First you make your hat.  We did paper pieces.  Our red was 2 x 1 1/2 in.  Our blue was 3/4 x 2 in.  Our white stripes were 2 x 1/4 in.  We then glued them together to make a hat.  Attach the hat to the handle of the wooden spoon. 
Then glue on the eyes and with a black pen, draw on a nose.  Take some cotton off your cotton ball to make a beard.  Glue on the beard. 
When dry, attach you magnet to the back of the pin.  You can use a pin if you wish.  We did two magnets since they do not damage clothing or children.  And after the holiday Uncle Sam can go on the fridge.


No-Spark Sparklers

We are having a terrible time with wildfires at the moment and ALL fireworks are banned in town, except for the Flagler Beach show which is over the water.  That doesn't mean that you can't have sparkers!  These are even a great option for children that are afraid of fire or too small to have it.
You Will Need:
Small wooden dowels about 14 inches long
Wired star garland in solid or multiple colors
Clear packing tape
Red or blue cardstock cut to 2 in by 1 1/2 in
Glue or glue dots
Scissors

For each sparkler that you make, cut wire garland into 10 pieces.  Make 5 each of 6 in long and 8 in long.
Trim off the stars from the bottom of each piece about inch up.  Line the pieces up on the cardstock and tape down.

Then add glue dots to the dowel at the top where the paper will attach.  Attach the edge to the dowel and roll the remaining paper and wire around the dowel.  Secure the end with more glue or glue dots. 
Once secure, arrange the  wire garland to look like a sparkler.  Enjoy!

Rocket Poppers


You Will Need:
White tissue paper
String or ribbon
Scissors or paper trimmer
Hot glue or glue dots
8 1/2 x 11 Patterned cardstock
8 1/2 x 11 Solid cardstock
Candy or small toys

Cut your patterned paper in half to make it 4 1/4 x 11.  Also cut your white tissue paper to this size.  Turn the patterned paper pattern side down and glue the tissue paper on the bottom.  About inch over lapping. 

Next, roll the paper and tissue into a tube, about the size of a toilet paper roll and secure with hot glue or glue dots.  Cinch the tissue at the bottom and tie with ribbon or string. 

Now for the fun part - fill the tube with candy or small toys for your guests or friends. 
Take the solid colored cardstock and draw an 8 inch circle.  Cut it out and then in half to make a fan like shape.  Roll this piece into a cone.  Use glue dots or hot glue to attach the cone to the top of the rocket. 

6.16.2011

Felt Counting Fish

In honor of Go Fishing Day on June 18th, I made some simple felt fish for Taft.  I added some buttons in different numbers to use for counting practice as well as fishing.
Things that you will need:
Felt sheets (these can be bought at most crafts stores for less than 40 cents per sheet)
Embroidery thread in multiple colors
Needle
Embellishments if wanted
Stick for a pole (we used a wooden spoon)
Magnet
Metal washers (they can be found in bulk at home improvement stores)
Glue
Scissors
The first thing that you need to do it to make yourself a pattern.  I drew out some fish on paper until I got two that I liked.  For each fish you will need to cut out two fish from the felt.    
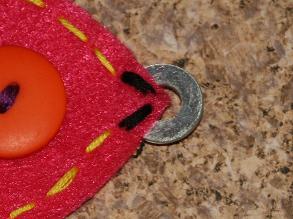
If you are going to add embellishments, this is the time.  We added buttons in different numbers on each fish to use for counting. You will only put them on one side of the fish so it must be done before sewing the fish together.  Then place the two on top of one another and stitch them together.  We used different bright colors of thread.
 You need to leave a small opening at the mouth of the fish to sew on the washer. 
Now you have the fish finished.  It's time to make a fishing pole.  Any stick would do.  You can buy a stick or just get one from outside.  We decided to use a wooden spoon left over from another project.  It is the perfect size for my three year old.
We attached three to the spoon and secured with glue.  Then you add a magnet as the "hook".  So far, we have not stopped playing or "fishing".

12.24.2010

Wednesday, December 22nd

 On Wednesday, Quincy brought a little art project for Taft.  A snowman garland.  It was foam shapes and foam stickers.  Taft was pretty good at putting on the hats and scarfs.  Some might be a little off, but he tried.  Mommy helped him string them and hang them up in his room.

11.16.2010

Birthday Card

Tomorrow is Shane's birthday, so Taft and I decided to make him a card after dinner.  I thought that it was the perfect time since Shane was in the manroom.
Taft loved the painting.  After he painted the front of the card blue, he got a bath to get off the paint and let the card dry.
Then he did his favorite part which was using the glue sticks.  He helped glue every piece to the card.  When I told him it was finished, he went running as fast as he could to get "Daddy".  He was so proud of himself and Daddy seemed to like it too.  Even if it was a little early.

7.30.2010

July Art Work


A few pieces of art came home from preschool this month. Mostly scribbles on paper. Some with markers and white paper. Others with chalk on dark construction paper. This is by far the favorite. We are simply calling this "Rogue Wave". Please use your imagination.

5.09.2010

It's May Already?

Ok - I have gotten behind again. We have had a lot going on around here. Taft has been sick and has had some problems with school (more about that later). Of course, I am still working Monday thru Wednesday and Shane has taken a new job also. He is working for Horizon Foods. He loves it so far. We have not given up on the carpet business just yet, but with the economy the way it is, there just aren't that many people calling, so back to a "real" job. You know, the kind with a salary. ;0
April seemed to go by quickly. Taft had some allergy issues. April 19th he had a fever of 101 at school and they called us to pick him up. Shane went to get him and took him to the doctor. Just allergies. But that meant that he had to stay home fever free for 24 hours. Shane watched him the next morning and I took the afternoon. He went to school on Wednesday but had a temp when I picked him up. By Friday it was 103. He got more antibiotics but it could have been viral. Still not sure. We did see that he got a new tooth that week also, so that could be our reason. On the 26th, they called me to come get him again. No fever, but he was screaming and they couldn't get him to calm down. He was also holding his ears. I could hear him from the front door when I got there. We thought it might be an ear infection so we went to the doctor yet again. He was check head to toe with no cause found.
After looking things up on the Internet and talking to his teachers, we believe that he may have Sensory Perception Disorder. As the weeks go by and I pay more attention, it seems more and more likely. Certain things just set him off. They are keeping a log on him at daycare to see if the same things get him upset each time. We have a list going at home also. The next thing to do is to see the doctor and see what they think. If he has it, hopefully we can find more ways to deal with it. It is more common in children with autism but I don't think that is an issue. We just want to be able to help him cope better.
Taft also brought home some art projects from school. One is from March and one is from April. He seems to be very artistic.

As you can see, the shamrock is finger painted and then little green paper pieces are stuck on top of the paint. Great placement. He is a genius.

I think that he worked on this one with little help from Ms. Celeste.

3.23.2010

Spring Artwork

Just a little look at Taft's first school artwork. They did these about 2 weeks ago and Ms. Celeste sent them home today. I put it on purple paper so that it would scan. She helped them but he picked out his colors.
Yes - I am going to frame and hang.